


What is Playwright?
Playwright is a testing library built by Microsoft for frontend end-to-end testing. End-to-end testing simulates a real-world scenario from the end user's perspective.
Installation
To get started you'll need to install Playwright. First, go to a new directory on your machine where you want to keep your testing stuff. Then open up a terminal. Navigate to that directory, and run npm init playwright@latest to install the latest version of Playwright.
After you run this command, Playwright will go through some questions to ask you how you want to set up your project. I chose Javascript rather than Typescript as my language and the rest of the questions I answered with the default answers. Once this command runs it initiates a new project in your chosen folder with several folders to get you started as well as some sample tests.
Let's understand what you start out with.
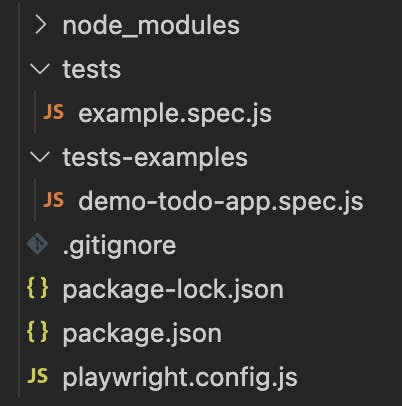
Here's a screenshot of what's added into your project directory by the init command. Your node_modules folder contains all the project's dependencies to make it able to work. The tests folder is where you will write your tests. The tests-examples folder presents a demo test from Playwright. The .gitignore file contains all the things you don't want tracked when you commit your code. Package-lock.json and package.json files save the dependencies for your project (so that if you send your project to another developer, for instance, they can know what libraries they need to download). The playwright.config.js file is where you can configure what browsers to use, what types of reporters you want, and other things.
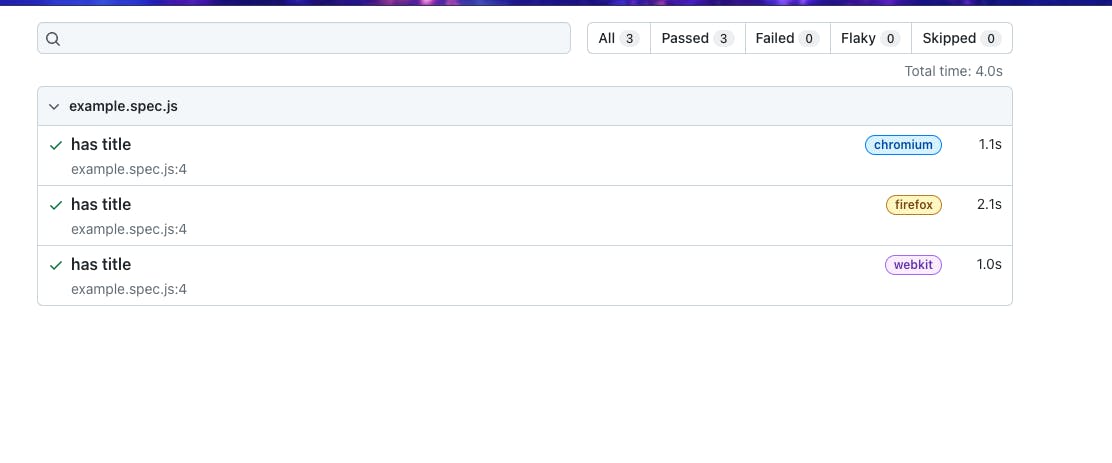
To make sure everything is working, run this command in your terminal to run your first test: npx playwright test. That will run the example test that lives in the tests folder of your project. To view the html report run npx playwright show-report - this will open up a report on the tests in your web browser.
Writing your first test:
So far we've just run the code that comes with a Playwright project. Let's start altering that code to make it our own. In the tests folder let's write our first test.
Test Syntax
Writing a test in Playwright wasn't as scary as I thought! Let's start by writing test and opening a parenthesis. Inside the parenthesis we put the description of the test as a string (in quotes) - this is the test's title. We'll follow this title with a comma separating the description from the meat of the test itself. This will start off with an async keyword and then we write our test function. We use the await keyword because what is returned by the next line of code is a Promise. We tell Playwright what webpage we want to go to with the goto method. Then we tell Playwright what we want to do there - in the given example, we test to see if the webpage has the title that we expect it to have.
test('has title', async ({ page }) => {
  await page.goto('https://playwright.dev/');

  // Expect a title "to contain" a substring.
  await expect(page).toHaveTitle(/Playwright/);
});
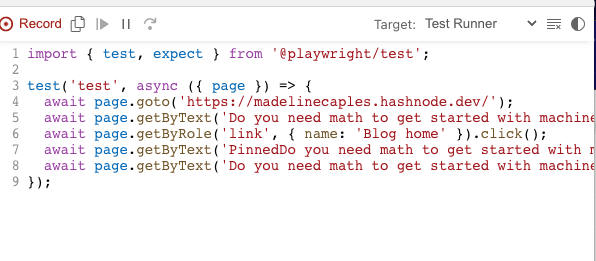
Now let's change a few things: instead of going to the example webpage playwright.dev, let's go to a new webpage by changing up what's inside of the goto method. I'm going to use the url for my blog: 'https://madelinecaples.hashnode.dev/'. Note that your url has to include the https part for Playwright to know what to do with it.
Now we have await page.goto('https://madelinecaples.hashnode.dev'); as our first change. We'll also want to change the title of the webpage that we're expecting or otherwise our test will fail: await expect (page).toHaveTitle('Madeline\'s Machine Learning Log'); - you can use either a regular expression or a string as the argument for the method toHaveTitle.
Run your test command again to see the tests passing.
Using Locators
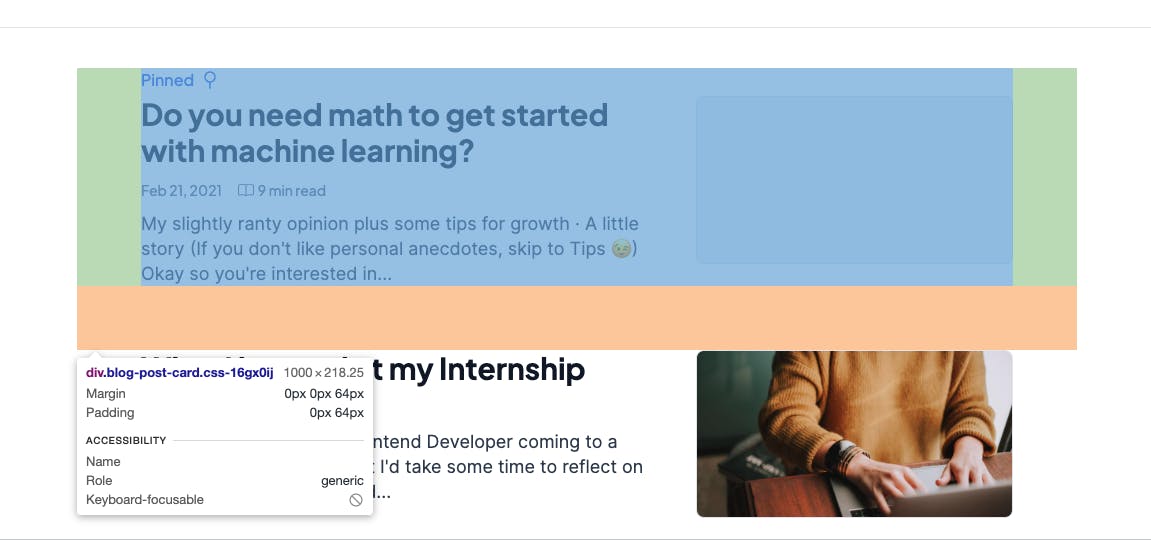
Okay, so far so good, but we want to do more than verify the title of my blog page. Let's say I want to check to see whether the pinned article is clickable. How could I do that? First I'd need a locator. Locators are how Playwright finds elements on the webpage.
There are a few ways you can pick locators. You can inspect the element using the developer tools and use that to tell Playwright where to go.
You can also use Playwright's codegen function. Use the following command to navigate to the blog website and then click around the screen as you typically would as a user to find the element you are looking for: npx playwright codegen 'https://madelinecaples.hashnode.dev/'. Playwright will generate a new test file in another browser window that contains the locators for the elements you clicked on.
You can also use the Playwright vscode extension "pick a locator" button to find a locator. It works similarly to the above option, in that it opens up a browser window, where you can enter your desired url, and then click around on the page to locate elements.

I'm going to change the second test in my example.spec.js file to have the title 'verify pinned article'. Then I'm going to test out my new locator:
test('verify pinned post', async ({ page }) => {
  await page.goto('https://madelinecaples.hashnode.dev/');

  // Make sure pinned article is clickable
  const pinnedCard = page.locator('[class="blog-post-card css-16gx0ij"]').first(); // chosen by me using dev tools
  // or
  const pinnedHeading = page.getByRole('heading', { name: 'Do you need math to get started with machine learning?' }) // chosen by playwright using pick locator tool

  // expect these elements to be clickable links
  await expect(pinnedCard).toBeEnabled();
  await expect(pinnedHeading).toBeEnabled();
});
Expect
The last part of the test shows the use of expect which comes with its own methods. The toBeEnabled method checks that links and buttons are clickable.
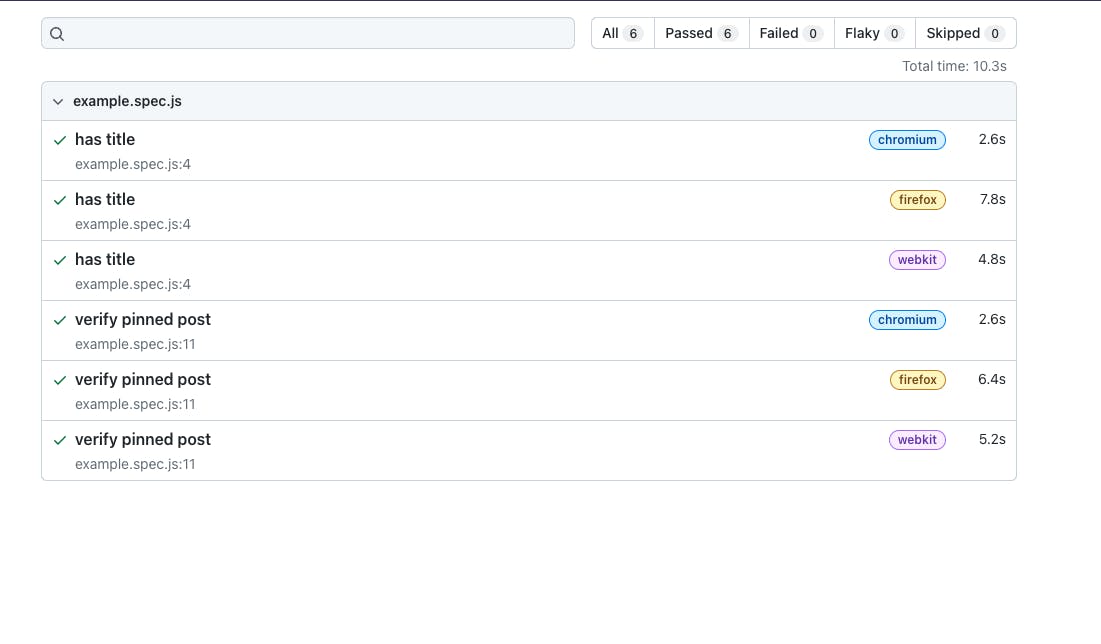
Now run your test with the above command and see if it passes! Your results should look something like this.
There's plenty more you can do with Playwright, but this is a good start. Let me know if you have any questions or comments below. 😊
Going further:
Maybe you like the look of this Playwright thing and want to see more - I'd suggest the following resources as great next steps.
Playwright Documentation: https://playwright.dev/docs/intro
Read about Playwright background, comparisons, and history from Lambda test: https://www.lambdatest.com/playwright